

 Photos of recipes from the new book Tender Grassfed Barbecue
 Photos of recipes from the cookbook Tender Grassfed Meat
When It Comes to Food — Quality Matters
By Stanley A. Fishman, author of Tender Grassfed Meat and Tender Grassfed Barbecue
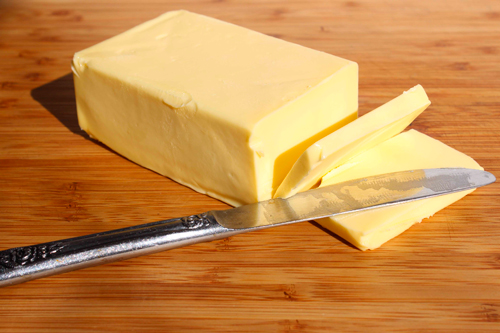
My favorite grassfed butter, the very best butter I have found.
Henri Charpentier was once the most famous chef in America. He was born in France and became an orphan at an early age. He grew up in poverty, became an apprentice in a restaurant, and literally cooked his way into becoming one of the most famous chefs in France. Charpentier moved to the United States and started a small restaurant in a rural area, which was patronized by some of the most wealthy, famous, and powerful Americans of the day, who would travel for many hours just to enjoy the wonderful food he cooked.
He published the Henri Charpentier Cookbook in 1945. In the book, Charpentier shared his most important cooking secret. The secret was very simple. He advised his readers to buy the very best butter they could afford.
He did use a great deal of high-quality butter in his cooking and in his cookbook.
When I first read this simple advice, I laughed at it. It seemed like a joke. Everybody knew that butter was butter, and all butter was the same. I was very mistaken, but I knew no better. Americans had been told for many years that our modern American food was all very good, and all pretty much the same. Trying to find and buy an especially good type of butter seemed both foolish and extravagant.
I have learned a lot over many years of cooking. One of the most important things I have learned is that some varieties of a particular food are of a much better quality than others. Using the best butter I can find in my cooking has made an enormous difference, both in taste and in nutrition. And this distinction applies not only to butter, but to every kind of food.
Our ancestors were obsessed with quality and were always trying to find the best quality food they could afford, and spent a lot of time and effort in doing so.
Some years ago, I used small amounts of a relatively expensive olive oil to marinate meats and achieved excellent results. Over the years, I started using less expensive olive oils, which were also organic and traditionally made.
Yesterday, I found myself thinking about the wonderful olive oil I used to use and bought some. I used a little bit as part of a marinade for some grassfed lamb. The meat came out so tender, with an intensity of flavor that was far beyond what I expected. The good oil had somehow brought out and intensified all the flavors in the dish, making it much better than it had been when I used the less expensive oil.
I now realize that Henri Charpentier was right. The quality of the ingredients is the most important part of cooking a great meal. The oil I used was certainly not the most expensive olive oil out there, but it was so much better than the others I had used. It changed the quality of the dish from good to excellent, and was worth the extra expense and effort.
Price is not the only indicator of quality. Something is not necessarily better just because it costs more. You will only know the quality of the food when you taste it and digest it.
I am convinced that there is a huge difference in quality in the foods that we can get, and it matters very much. Our ancestors knew that, and as with so many other things about food, they were right.
Curry Anything — A Great Meal from Leftovers
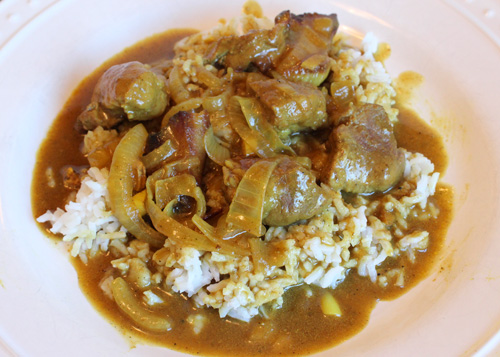
A delicious, easy curry.
By Stanley A. Fishman, author of Tender Grassfed Meat and Tender Grassfed Barbecue
I cook many kinds of meat, in many ways. Often there are leftovers, which I would dutifully place in the appropriate containers and put in the refrigerator. I would look at them in the refrigerator, from time to time, and decide there was not enough left to make a meal. Then, after enough time expired, I would throw them out.
At least that used to be my pattern. Now I use them to make delicious meals. As usual, the inspiration came from our ancestors. They would often combine different kinds of meat in the same dish, often with many different vegetables. It occurred to me that this could solve my problem of not having enough left over of a particular meat to make a meal. So I started combining them into stews and curries.
If I have small amounts of leftover beef, chicken, lamb, pork, or other meat, I will combine them. Since the meat has already been cooked, there is no need for marinating or browning, and the stews and curries cook very quickly. The curries are quicker to cook than the stews, so I make them more often.
I use the same recipe to cook leftover meats. It always turns out delicious, is ready in no more than 30 minutes, and is full of great nutrition. Here is the recipe:
Curry Anything
2 to 3 cups of leftover meat (such as beef, lamb, pork, chicken, turkey, or any or all of the above), sliced or chopped into small, thin pieces
4 tablespoons organic butter, (or organic ghee, or organic coconut oil)
1 large organic onion, peeled and sliced
3 large cloves organic garlic, peeled and sliced
A piece of organic fresh ginger, about 1 inch long and 1 inch thick, chopped into tiny pieces
3 or more tablespoons of the organic curry powder of your choice, (I use the organic curry powder sold by Mountain Rose Herbs)
2 tablespoons organic flour of your choice, (which can include non-grain flours such as almond flour)
1 1/4 cups homemade broth of your choice
2 tablespoons pure fish sauce, (I use Red Boat Fish Sauce, as I love its taste, traditional way of being made, and it makes me feel good when I eat it)
- Heat the fat in a heavy frying pan, preferably cast iron, over medium heat, until the fat bubbles. Add the onions, garlic, and ginger, and cook for 2 minutes, stirring occasionally. Add the curry powder and the flour, and mix with the vegetables in the pan.
- Add the broth and fish sauce, and stir until the mixture thickens, and starts to simmer. Add the meat and mix well. Bring the mixture back to a simmer, then reduce the heat to low, and cover the pan. Simmer covered for 25 minutes. Serve with the organic rice of your choice.
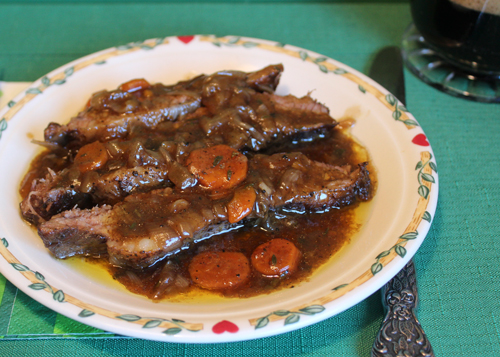
Brisket Pot Roast for St. Patrick’s Day
By Stanley A. Fishman, author of Tender Grassfed Meat and Tender Grassfed Barbecue
 Most Americans think of corned beef and cabbage when it comes to a traditional Irish meal on St. Patrick’s Day. In Ireland itself, the selection is much more varied, including steak, prime rib roast, stew, or a pot roast made from fresh meat.
One of the glories of Irish cuisine is the magnificent quality of the native ingredients. Most of the beef raised in Ireland is still grassfed and grass-finished, and raised on small farms.
This recipe depends on the quality of the ingredients, and the better the ingredients, the better the dish.
The new beef brisket point introduced by U.S. Wellness Meats is perfect for this recipe. It has the deep beefy flavor of grassfed beef, and a nice fat cap that is needed for this recipe. It is important that all the other ingredients be of high quality as well, meaning organic (or the equivalent) vegetables and herbs, Guinness® stout from Ireland itself, and rich, deeply flavored grassfed beef broth. And it does have a bit of green in it, in the form of green onions and thyme.
This recipe is absolutely delicious and the meat is very tender and flavorful. Here’s the link to the recipe which is posted on the U.S. Wellness Meats blog:
Irish Brisket Pot Roast for St. Patrick’s Day
Thanksgiving Tip #4: Roasting the Turkey
By Stanley A. Fishman, author of Tender Grassfed Meat and Tender Grassfed Barbecue
 Many people are intimidated about roasting the turkey—I find it very easy. No need to turn the turkey over, or cover it with foil, or deep fry it in gallons of boiling fat, or cook it in a plastic bag, or any of the other modern methods that have been invented.
This roasting method is intended only for a turkey that weighs no more than twelve pounds when purchased.
In my opinion, I think the most delicious turkey is one that is:
- Completely natural, with no added ingredients such as added liquid
- Brined and stuffed
- Roasted in the oven, no turning required
- Basted a few times
My previous three tips have covered Selecting the Turkey, Brining the Turkey, and Stuffing the Turkey.
Now we come to the easiest part, the roasting.
I take the turkey out of the refrigerator. I adjust the oven rack to the second lowest position, and then preheat the oven to 325 degrees.
I make the stuffing, and put it in the bird.
I place the turkey in a lightly greased,sturdy roasting pan, breast side up, directly on the pan. No rack is used.
I cover the turkey with melted, salted butter, of good quality. This will take at least a quarter cup, but do not be afraid to use more if needed.
I then place the turkey in the preheated oven.
I baste the turkey every half hour with the drippings in the pan. After an hour and a half, I baste it once with fresh orange juice.
I roast the turkey until a meat thermometer, inserted in the thickest part of the breast, reads at least 165 degrees (which is the minimum safe temperature recommended by the United States Department of Agriculture). Because modern birds have such big breasts, the dark meat will be ready before the white meat, contrary to what most cooking authorities say. Depending on the size of your turkey, your oven, and the temperature of the bird when you put it in the oven, it can be ready anywhere from an hour and a half to two and a half hours. It is important to use the thermometer, and not guess.
Finally, I only let the turkey rest for the amount of time it takes me to get all the stuffing out of the bird and into a serving dish, about ten minutes. Most authorities recommend that you let it rest much longer than that, but that often results in cold or lukewarm turkey. If you have brined the turkey, it will be juicy even if some of the juice comes out.
This is the way I make the Thanksgiving turkey every year, and it is always delicious.
Disclaimer: Information found on the Tender Grassfed Meat site, including this article, is meant for educational and informational purposes only. Any statements or claims about the possible health benefits conferred by any foods or anything else have not been evaluated by the Food & Drug Administration and are not intended to diagnose, treat, cure, or prevent any disease. None of the content on the Tender Grassfed Meat site should be relied upon for any purpose, and nothing here is a substitute for a medical diagnosis or medical treatment.
For More Thanksgiving Tips:
Thanksgiving Tip #1: Selecting the Turkey
Thanksgiving Tip #2: Brining the Turkey
Thanksgiving Tip #3: Stuffing the Turkey
And finally: Turkey Broth from Leftovers — Paleo, Primal, and Delicious
Thanksgiving Tip #3: Stuffing the Turkey
By Stanley A. Fishman, author of Tender Grassfed Meat and Tender Grassfed Barbecue
 Stuffing a roasted bird is one of the oldest ways of cooking it, and is traditional in many lands. The stuffing can provide wonderful flavors to the roasting bird, while providing a delicious side dish. Until recently, all stuffings were cooked inside the bird. But things have changed.
Now, because of health concerns, cooking the stuffing inside the bird has fallen into disfavor.
Any food can be dangerous if it is not properly processed, stored, or prepared. I do see a concern with having the interior of the stuffing in a huge turkey not being thoroughly cooked, but I do not use huge turkeys. And I do see a concern with letting the stuffing sit inside the bird at room temperature for an extended period of time, but my turkey goes into the oven right after it is stuffed.
I use a brined turkey, with the salt in the brine offering some protection, and my turkey is never over twelve pounds. I use quality ingredients, put the turkey in the oven right after stuffing it, and my stuffing is always cooked through and hot all the way through, cooked right in the bird. Since no one who has eaten my stuffing has ever been ill or even uncomfortable from it, I am confident in eating it, though I cannot guarantee anything.
If you wish to follow the experts’ advice, and cook the stuffing outside of the bird, I cannot give you any tips, because I have never done it.
Do not rely on anything I have said regarding food safety, as I am no expert, and I am only describing how I personally cook stuffings. The decision is yours.
Many Options for Stuffing
There are many options available for making a stuffing. You can use almost any kind of bread, including nut breads, gluten-free breads, or any kind of bread crumbs. Or use cooked rice, even crumbled nuts. You can flavor the stuffing with many kinds of vegetables, sautéed in butter or something else, moistened with eggs, fruit juice or cream, seasoned with any of a vast array of herbs and spices. Some people add innards, or sausage, or chestnuts, or walnuts, or other nuts, and the variety of what you can do is so great that it can be very confusing. You can also use a quality stuffing mix, hopefully organic, with no soybean oil or canola oil added, and add various thing to it as well.
This is what I do. I start with plenty of butter, which I melt in a big frying pan. I then add a large amount of chopped onion, chopped celery, and sometimes peeled and chopped apples, and sauté them in the butter slowly until they are soft and lightly colored.
Then I put the stuffing base, whether it is bread cubes, or crumbs, or an organic stuffing mix, into a big bowl, and add the sautéed vegetables and the butter they were sautéed in. I stir it, and then add enough lightly beaten eggs, including the yolks, to moisten the stuffing, and mix everything well. I will then add any extra ingredients, such as chopped herbs, chopped nuts, maybe some orange or apple juice to make sure the stuffing is moist enough, and whatever else I want to put in it.
The stuffing then goes into the previously brined and drained turkey, both the cavity and the hollow area in front of the breasts, which is covered by a big flap of skin. Most recipes will tell you not to pack the stuffing too tightly, and to leave room for expansion, but I pack it in, and leave the opening to the cavity open, so the stuffing can expand out that way if it does expand.
The bird goes into the preheated oven right after the stuffing is in.
I have not given amounts because so much depends on personal preference, and the size of the bird. I have found it best to make sure that the stuffing is moist before it goes into the bird, but it should not be soaking wet.
A stuffing like this is not only delicious as a side dish, but adds a wonderful flavor to the whole turkey.
Disclaimer: Information found on the Tender Grassfed Meat site, including this article, is meant for educational and informational purposes only. Any statements or claims about the possible health benefits conferred by any foods or anything else have not been evaluated by the Food & Drug Administration and are not intended to diagnose, treat, cure, or prevent any disease. None of the content on the Tender Grassfed Meat site should be relied upon for any purpose, and nothing here is a substitute for a medical diagnosis or medical treatment.
Previous Tip: Brining the Turkey
Next Tip: Roasting the Turkey
Thanksgiving Tip #2: Brining the Turkey
By Stanley A. Fishman, author of Tender Grassfed Meat and Tender Grassfed Barbecue
 Most of the cooking problems that people run into when roasting a turkey, such as the breast meat getting cooked before the dark meat, the meat drying out, the turkey being tough, having to turn the turkey over, etc. can be avoided by simply brining the turkey.
Brining will help keep the turkey moist and juicy, and add wonderful flavors that will make the turkey absolutely delicious. Brining penetrates the meat with the ingredients of the brine, resulting in the interior meat being flavored as well as the outside. And brining is very easy to do, at least with my method.
My basic brine is to add three tablespoons of unrefined sea salt to three cups filtered water, and stir the mixture with a spoon until the salt dissolves into the water. I then add a cup or two of organic apple juice, and three cloves peeled garlic.
Next, depending on what flavors I want, I will add various fresh or dried herbs, such as sage, thyme, rosemary, parsley, or any combination of them. A few branches will do if you are using fresh herbs, and a few teaspoons will do if you are using dried herbs. You can also add various spices such as black peppercorns, a clove or two, or whatever spice you want to flavor the turkey.
Once the brine is made, I take out anything that is inside the cavity, such as a bag of innards and the neck. Then I rinse the turkey with cool filtered water. Then I pour the brine into a large stainless steel bowl large enough to hold the turkey. I then carefully lower the turkey, breast side down, slowly into the brine. Then I add enough filtered water to cover the turkey. It is okay if part of the back remains uncovered. The back will be up since the breast side is down.
I do this the day before Thanksgiving, then refrigerate overnight.
The quantities I gave are for a turkey no more than twelve pounds. I do use a lot less salt in my brine than most recipes call for, but this amount works perfectly for me and does the job well.
Using this brine makes cooking so much easier and flavorful that I always brine every turkey I roast.
Previous tip:Â Selecting the Turkey
Next tip: Stuffing the Turkey
Thanksgiving Tip #1: Selecting the Turkey
By Stanley A. Fishman, author of Tender Grassfed Meat and Tender Grassfed Barbecue
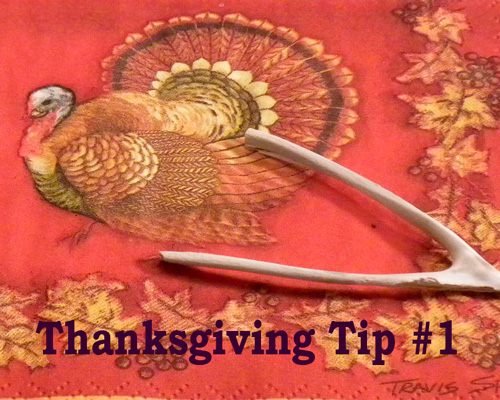 The centerpiece of most Thanksgiving dinners is the roast turkey, which is too often disappointing. There is an incredible and confusing variety of turkeys that are available at Thanksgiving. After much experience, I have come up with my own rules for choosing a turkey.
First, the turkey must not be too large, generally, smaller turkeys are:
- More tender and flavorful
- Easier to cook
- Quicker to cook
I prefer turkeys that are no more than 10 to 12 pounds in weight. If you are feeding a crowd, it is better to cook two smaller turkeys than one huge one.
Second, buy a truly natural turkey, without additives.
This means a turkey that does not have anything added to it at all, and just consists of the turkey itself. In other words, turkeys that have liquid solutions added to the bird are to be avoided. It is important to read the label, as you may find that various substances have been added to the turkey.
Third, it is also important to know what turkeys are available in your area, and to purchase from a producer who is known to have quality turkeys. We always buy our turkeys from the same producer every year, and we are never disappointed.
Next tip: Brining the Turkey
Thai Coffee, No Sugar, Real Cream
By Stanley A. Fishman, author of Tender Grassfed Meat and Tender Grassfed Barbecue
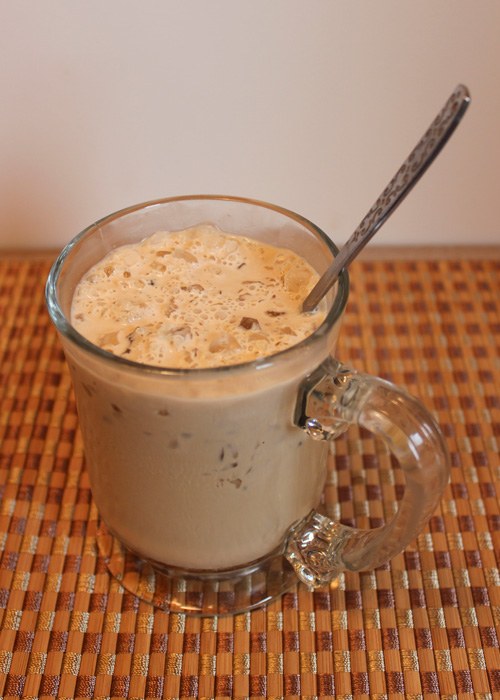
Thai coffee, creamy and sweet with organic cream.
Some years ago, my wife and I had a favorite Thai Restaurant, and we really enjoyed their Thai coffee, a very cold, sweet, and flavorful drink, very refreshing and tasty. Nothing like it on a hot day.
The restaurant closed, we discovered real food, and we just stopped having Thai coffee. A couple of Thai restaurants opened in our area, and we remembered how much we liked the previous one, so we decided to try them out. We were delighted to see that the first restaurant had Thai coffee. But being committed to real food, we had to ask if it had sugar or any other sweetener. “Lots of sugar,†said the waitress. We had given up eating refined sugar a long time ago, so this coffee was out.
The second restaurant also had Thai coffee on the menu. When we asked about sweeteners, once again we heard that there was lots of sugar.
We wanted Thai coffee! But not the sugar.
So I checked out my library of cookbooks, and found three books on Thai cooking. Two of them had recipes for Thai coffee. Interestingly enough, neither recipe added sugar, but both depended heavily on canned evaporated milk. No way to know where the milk came from, or what the cows were fed or given, or what cooking and canning milk would do to its nutritional qualities.
But we still wanted Thai coffee! So what could we do? Invent our own version, of course. We decided to leave out all sweeteners and substitute cream, real, heavy cream from a good organic dairy for the evaporated milk. The recipe was very simple, and very delicious. It did not taste like our memory of Thai coffee, not exactly, but it was very good, creamy, cold, and just delicious. And very refreshing. The recipe is simplicity itself.
Simple Thai Coffee for Two
Chill a pint of strong coffee in the refrigerator.
For each serving, fill a tall glass about seven-eighths full of shaved ice, (or ice crushed in a blender), preferably made from filtered water.
Add enough coffee to the ice until the glass is three-quarters full of coffee.
Add enough fresh, rich, heavy, organic cream to fill up the glass. Mix well with a spoon.
Serve and enjoy.
When It Comes to Nutrition, We Are All Individuals
By Stanley A. Fishman, author of Tender Grassfed Meat and Tender Grassfed Barbecue

This delicious potato dish will be enjoyed by most, but not by people who are allergic to nightshades.
When it comes to nutritional advice, we are treated as if we are all the same person, with the exact same nutritional needs. Doctors and nutritionists give the same recommendations for what everyone should eat at a certain age.
Individual nutritional needs of the person are ignored, and never considered. The standard is the same for everyone of a certain age group.
Yet the truth of the matter is that each of us is a unique individual, of different sizes, body composition, body chemistry, genes, and many other factors that make each of us unique.
The “one size fits all†approach taken by the medical profession and conventional nutritionists does not really fit anyone.
The Wisdom of Hippocrates
Hippocrates of Kos, the most famous doctor of ancient times, lived well over two thousand years ago. Yet his approach to treating his patients was totally different from the one-size-fits-all approach, and makes a lot more sense.
Hippocrates treated each of his patients as a unique individual, getting to know them. His treatment of choice was diet, which mainly consisted of finding out what foods the patient needed, and providing them. He paid careful attention to how the individual patient responded to the foods he prescribed, and if the desired results were not obtained, he tried something else, either other foods, or rest, or a particular exercise, or any combination of the above. Drugs and surgery were used only as a last resort. Hippocrates was famous for healing most of his patients, and even stopped a plague that was devastating Athens.
The same principle applies to nutrition and natural remedies. What works for one person may not work for another, or may even harm them. In fact, since our nutritional needs often change, what worked at one time may not help another time. The very same food or herbal remedy that heals one person may be useless for another person. This is because our nutritional needs, while very similar to those of other people, are never identical, and often change.
For example, some people are allergic to members of the nightshade family of plants, such as potatoes, and other people thrive on them.
So How Do We Know What to Eat?
Nature has given us the senses we need to determine this. Our senses of taste, smell, sight, and our intuition can tell us what is good for us to eat at a particular time. The healthy peoples studied by Dr. Weston A. Price understood this principle, and had developed a traditional cuisine over the centuries that kept them so healthy that they had no disease, and no need for medical care. Being of a similar heritage and ancestry, the foods that their ancestors ate helped them thrive. Yet even among these so-called primitives, individuals would vary their diet depending on the needs of the moment. They might stop eating a particular food that did not appeal to them at the time, or seek out a particular food that they craved. These patterns were noticed and remembered by these peoples, who would make special foods available to individuals at a certain time, such as recovering from a physical injury, or being pregnant, or wanting to conceive, or many other circumstances.
This is much harder to do in modern society, where food has been industrialized and changed by chemical processing and the use of flavor enhancers. Our senses often cannot tell what industrial foods are good or bad for us, or how much to eat, or how to get particular nutrients.
The solution I have found for myself, is simple.
Just eat real food, as said by Sean Croxton. Our bodies know how to sense and deal with the foods of nature.
Pay attention to how a food smells, tastes, and to your cravings for a particular real food. I find that following my senses and cravings is the best way I have found to know what to eat, and how much.
This only works with real food. The better a particular real food tastes, the better I feel it is for me to eat it at that particular time. And if a food does not appeal to me, or tastes bad, I stop eating it. Often a food that tasted wonderful at the beginning of a meal will not taste as good after I have eaten some of it. This is my body telling me that I have had enough. Our bodies know what we need and how to get it from real food.
Disclaimer: Information found on the Tender Grassfed Meat site, including this article, is meant for educational and informational purposes only. Any statements or claims about the possible health benefits conferred by any foods or anything else have not been evaluated by the Food & Drug Administration and are not intended to diagnose, treat, cure, or prevent any disease. None of the content on the Tender Grassfed Meat site should be relied upon for any purpose, and nothing here is a substitute for a medical diagnosis or medical treatment.
Saving a Heritage Ham
By Stanley A. Fishman, author of Tender Grassfed Meat and Tender Grassfed Barbecue
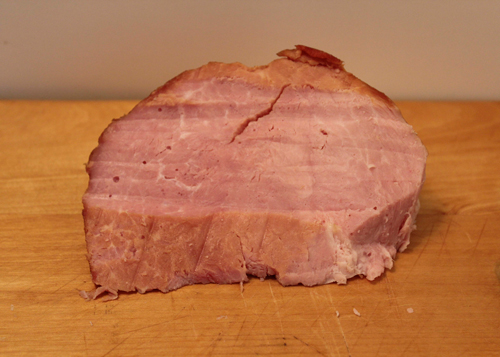
Notice the smoke ring around the edges of the heritage ham, after I marinated it and smoked it with pork fat.
The marketing was effective, I must admit. It even convinced me. A large boneless ham, raised on a small farm, from a heritage breed, cured in a traditional manner, smoked over hickory wood. And at a bargain price! The ham was fully cooked, which meant I could reheat it slowly in a low oven. Easy.
When the ham arrived, and was thawed, I started to take off the reddish brown wrap. As I started to remove it, I realized that the wrap was clear. The ham itself was covered with a dried coating, reddish brown in color, which had the consistency of sawdust glued together. Netting lines were deeply sunk all over the ham, from the netting that was used when it was hung to smoke.
I began to realize that the coating around the ham was the ham itself, what the outside of the roast had turned into, with not a single shred of fat in evidence. In mounting horror, I came to realize that all fat had been trimmed off the ham before smoking. With no fat to keep it moist, the ham had dried out in the smoking process, and lost most of its moisture. I stuck a fork in the ham, it met a lot of resistance. The meat was tough.
I sliced off a small outside piece of the ham and tasted it. The outside meat tasted terrible, with a horrid texture of sawdust. The interior meat was dry, so dry. Hardly any smoke flavor. Chewy, not tender at all. Not good. But there was a hint of a good pork flavor in there.
My family was expecting a nice meal. I decided to save the ham.
A plan was needed. I decided to cover the ham in organic apple juice, and marinate it for a few hours. This should add moisture and flavor. Then, I would add fat and heat it slowly in front of a smoky barbecue fire, at very low heat. This would add the smoke flavor it should have had. And I would restore the fat to the meat, by putting some sliced pork fat from another roast over the top of the ham.
I did not know if this would work, but I was going to give it my best.
But first, that sawdust-like outer coating had to be trimmed off and discarded. I took a sharp knife and trimmed the whole thing, getting off every scrap of the outside. I placed the ham in a glass bowl, poured the apple juice over it, and set it to marinate.
A couple of hours later, I stated a barbecue fire, using some hickory. I brought the temperature up to about 225 degrees. I placed the ham on a rack in a pan, covered the top with sliced pork fat, and set it to smoke. Several hours later, I boiled down the apple juice used for the marinade, until three-quarters of the liquid was gone, and used it to baste the ham occasionally. I was encouraged when I stuck a fork into the meat—it felt much more tender than before. I continued cooking until the roast had been reheated.
Then I started slicing it in the dining room. The knife glided easily through the tender meat. There was a wonderful wood smoke smell. The ham was moist, tender, and so delicious that it was hard to stop eating it. A disaster had become a wonderful meal. The inherent wonderful flavor of the heritage pork had been unlocked deliciously, once fat and moisture had been restored.
This post is part of Fat Tuesday blog carnival.
Next Page »